‘Cute as a Button’ Frownies
 Chocolate brownies are pure indulgence in my opinion, and perfect for chocoholics like me. They never fail to impress and are always first to sell out at the local cake sale. I like to eat mine with a hot frothy cappuccino on the side.

But I keep wondering if I could make those little squares of gooey dark loveliness even better. My mind whirred into action recently when I read about an opportunity on Bakingmad.com to have a recipe published in a new baking book that is being created in partnership with Silver Spoon and Macmillian Cancer Support. The book is called Little Book of Treats and will be sold in Marks and Spencer stores around the country in August and September this year. Fingers crossed my recipe gets chosen to go in the book.
The brief was to be innovative and exciting, but with a touch of luxuriousness. What better excuse to get my thinking cap on and turn my kitchen into a brownie experimentation lab.

I knew right from the start that my experimentation should primarily involve adding ingredients to the brownie mix, and over the next few days my mind was full of ideas. Most thoughts got dismissed straight away either because they had been done before or they just did not seem special enough. But then an idea came to me which I thought was perfect.
Let me introduce to you my ‘Cute as a Button’ Frownies. No that’s not a spelling mistake. A Frownie is my very own combination of flapjack and brownie, bringing the best elements of two popular tea time treats into one delicious square of cake.
The main added ingredients are oats, hazelnuts and dates. The end result is a chocolate treat that is more satisfying and gives the lucky person eating it both brownie gooeyness and flapjack chewiness.
Why are they so cute? Because I’ve topped them with my own homemade chocolate buttons which happen to be my favourite decoration at the moment. These could quite easily be topped with a shop brought chocolate button too.

My Frownies are easy to make, look scrumptious and taste amazing. I don’t think you need any more convincing. Here’s the recipe.
What you need:
- 200g luxury dark chocolate, roughly chopped
- 175g unsalted butter
- 250g caster sugar
- 100g plain flour
- 100g chopped dates (mine were pre chopped so I let them sit in hot water for 10 mins before I used them just to soften them up a bit. Don’t forget to drain the water before you add to the mix)
- 50g chopped hazelnuts
- 50g oats
- 3 large eggs
- 50g white chocolate and a button mould (I got mine from the lovely Sew White) if making own or a packet of chocolate buttons
- 21 x 27 cm baking tin greased and lined with greaseproof paper
- Makes 12 medium squares or 24 mini squares
How to make:
- Preheat the oven to 170c/325f/gas 3
- Put the chocolate and butter in a large heatproof mixing bowl over a pan of simmering water and melt together
- Mix in the sugar and stir until dissolved, then add the flour, dates, oats and hazelnuts and give it a good stir
- Finally add the eggs and stir again until completely mixed in then pour into the baking tin and gently smooth over
- Put in the oven for 25-30 mins. I tested mine after 25 mins with a knife and it came out with a bit of residue on, but I think for brownies this is fine as they are meant to be gooey inside. If it is a wet residue then it needs a bit longer
- Leave in tin for 10 mins then cool on a wrack. Cut into desired pieces and decorate with buttons sticking them on with a little bit of melted chocolate

I’m also going to enter this into a favorite blog challenge of mine, Alphabakes hosted this month by Ros from ‘The More Than Occasional Baker‘ blog. Ros shares the hosting of this challenge Caroline from ‘Caroline Makes‘ blog. This month the letter is B and on the basis that my Frownie creation is a variation of a Brownie, I can link to the letter B and enter 🙂

Don’t forget that my Natural Selection baking hamper giveaway is still running until 24th April and it includes chopped dates! Just comment on the giveaway blog post to be in with a chance of winning.
Hot Cross Buns and Easter Eggs
Hot Cross Buns
Last Easter I was busy packing all of our belongings into cardboard boxes as we prepared to make the life changing move out of London. Our new destination was Kent, where I grew up and where my Mum and brother still live. We had only been in one week when we packed more bags and set off up to Cheshire to see my in-laws for the Easter weekend. Something we do most years. At the time it seemed crazy after just moving house, but once we got there it was lovely to relax, have meals made for us and not unpack any boxes. The weather was fantastic and on Easter day we were spoilt with an Easter egg hunt and plenty of chocolate.
 This year without having to plan for a house move, I have been able to try making one of my most favourite things ever…hot cross buns. I actually love and hot cross buns and would be thrilled to eat them all year round. The way I like them is toasted, spread with unsalted butter and a cup of tea to wash it all down.
I have to say though that I’m not great at making bread items. I truly believe that it is something that takes a lot of practice, so I continue trying in the hope that my next effort will be better than my last. It’s a good job I think like this as my first attempt at hot cross buns were only just passable, but my second attempt was pretty near to perfect in my eyes, (picture below). I would have liked to know what Paul Hollywood thought of them! I digress. The most delightful thing about homemade hot cross buns are how much better they taste in comparison to shop brought which makes them totally worth the effort, even if they do take a few attempts to get right.

The basic hot cross bun recipe I followed can be found on the Baking Mad’s website. A few things I have done differently that might be worth trying as well include:
- Substituting 50g of plain flour for wholemeal flour
- Adding chopped dates and dark chocolate chips instead of raisins
- Using a 100g strong white flour, 25g butter, 125ml water and a pinch of sugar to make a paste. Then put this in a small freezer bag, snip the end and pipe crosses
The Baking Mad website also have a number of other Easter recipes that are worth having a look at, they include simnel cake, cake pops, Easter cake and Easter cupcakes.
Easter Eggs
Another wonderful thing about Easter is of course Easter Eggs. I love to look around the shops each year to see what temptations have been created. I’m always drawn to eggs that are a bit unique or have something special about them.
Hotel Chocolat, who are fast becoming a firm favorite of mine have a marvelous Easter egg selection and I was lucky enough to be allowed one to review (or scoff which ever way you like to put it). I picked the ‘You Crack Me Up‘ egg with extra thick shell because I loved the look of the chocolates that came inside.

Little happy faces, chicks, fried eggs and soliders all appeal to child in me and I thought it was likely that my own children would be wanting some of this egg too!

I was not disappointed. All (and that is saying something) the chocolates were lovely. If anything there could have been more! The shell was indeed extra thick and gave the egg a real feel of quality. I loved the packaging too. It came in a gorgeous box and the egg itself was wrapped in the most lavish looking light gold foil.

I have had this egg for 3 days now and it’s nearly all gone already. Easter egg reviewing…it’s a hard job but someone’s got to do it 😉

Many thanks to Hotel Chocolate sending me the Easter Egg to review and Baking Mad for sponsoring this post.
Mini Cupcakes for Valentines Day
 I know this is my second Valentine inspired post, (first one being my packed lunch made with love) but I just could not resist and think you might like it.
Cupcakes look amazing, there is no doubt about that, but for me the mountain of buttercream icing is a bit too much. However, give me a bite-sized version and everything changes. I’m quite happy to indulge in a completely guilt free fashion, and maybe even pop a second in for luck. Well they are only little so why not? Mini cupcakes can look just as amazing as bigger ones, and their size demands attention because they just look so cute. If you get creative in the way you present them, there is definite potential for the ‘wow factor’.
When I found out I was picked by Bakingmad.com as one of 15 bloggers to bake in their Valentine competition, I immediately started to think about how I could create an extra special entry which would include a few mini cupcakes. After all the brief was to make something I would want to receive myself! A few days later the idea of a mini cupcake selection box came to me. This is my alternative to the traditional box of chocolates that might get given on Valentines I guess, but much more thoughtful and definitely more memorable. I was thrilled with how the end result looked. Even better than I had imagined. I think these would be perfect for a birthday gift or any other occasion too.
So what flavours did I pick with so many to choose from? Here are my final four:
Hazelnut and chocolate: two of my favourite flavour combinations
Strawberry and white chocolate: it’s valentine’s after all so a bit of pink had to feature somewhere
Green tea: this is my experimental side coming out. I love the taste of these and the green colour that is totally natural
Peanut Butter: a bit of fun, and my daughters LOVE peanut butter
It is easy to change any of these (if you would like) to a flavour that you would prefer. Just put a quarter (from the recipe you use) of any ‘flavour’ ingredient in the cake batter mix and give it a whirl.
Makes 24 mini cupcakes and a few regular sized ones as well.
What you will need:
Basic cake batter
- 240g plain flour
- 200g sugar
- 3 tsp baking powder
- 80g unsalted butter, room temperature
- 240ml whole milk
- 2 eggs
- 1 tsp vanilla paste
Flavour ingredients
- 1 tbsp crunchy peanut butter
- 2 tbsp white chocolate chips
- 5g cocoa powder
- 1 tbsp nutella
- 1 tsp green tea matcha power
Icings and decoration (for the mini cupcakes, I just used more of the chocolate melt to cover the bigger ones I made as well)
I used a lot of Silver Spoon products as Baking Mad were kind enough to send me a selection for use in the competition, but you can get creative with any sprinkles or icing you might have in the cupboard already.
- half a pack of Silver Spoon strawberry chocolate buttons
- 1 pack each of Silver Spoon white and dark chocolate easy melt (you won’t use a whole pack but can seal up with a freezer clip and use another time)
- 1 Silver Spoon giant white chocolate snowie chopped up (I actually love these as the chocolate is lovely and they are really colourful so I’m sure the rest of the pack will get used up pretty quickly)
- a sprinkle of Silver Spoon chocolate heart duos and hundreds and thousands
- Sprinkle of chopped hazelnuts
- 125g icing sugar
- 40g unsalted butter, room temperature
- 15ml of whole milk
- 1 tsp green tea matcha powder


You will also need a 24 hole mini cupcake tin and cases, piping bag and piping nozzle (I use the Wilton M1 nozzle), old small box (I used an empty chocolate box)
How to make:
- Pre-heat the oven to 170c/325f/gas 3
- Put the flour, sugar, baking powder and butter in a freestanding electric mixer with a paddle attachment and mix until fully combined with a breadcrumb like consistency
- Put the milk, vanilla paste and eggs in a measuring jug, lightly whisk with a fork and add slowly to the dry ingredients in the mixing bowl and mix until smooth
- Divide the mixture into four separate bowls and add the nutella and cocoa to one, matcha powder to another, peanut butter to another and white chocolate chips to the final bowl
- Fill up 6 of the cases 2/3 full with each of the mixtures (any left over mixture put into large cases or make more little ones)
- Bake in the oven for 10-12 mins (any bigger ones you make will need 20 mins)
- Whilst baking, I made the green tea buttercream by putting the butter, icing sugar and milk in a freestanding electric mixer with a paddle attachment and mix slowly to start (icing sugar will fly everywhere otherwise) and then quicker until smooth. This normally takes at least 2-3 mins of mixing to get it smooth
- Once cakes are out and cooled you can start the really fun part and decorate them
- I put the white chocolate easy melt onto the peanut butter cupcakes and topped with small pieces of the white chocolate snowie. You have to work quick with the easy melt as it dries and hardens pretty quickly. I used a palette knife to spread it on
- I put the dark chocolate easy melt on the chocolate and hazelnut cupcakes and sprinkled with chopped hazelnuts and a bit of gold edible glitter
- I spread melted strawberry chocolate buttons on the white chocolate chip cupcakes, then sprinkled with hundreds and thousands and for a final valentines touch added a chocolate heart
- And for the green tea cupcakes I put the buttercream in a piping bag, iced starting on the outside working in to make a little swirl, and the same the strawberry cupcakes, finished with a chocolate heart
- To present I put 16 of my mini cupcakes in an empty box that used to have Christmas chocolates in and tied a pink ribbon round it

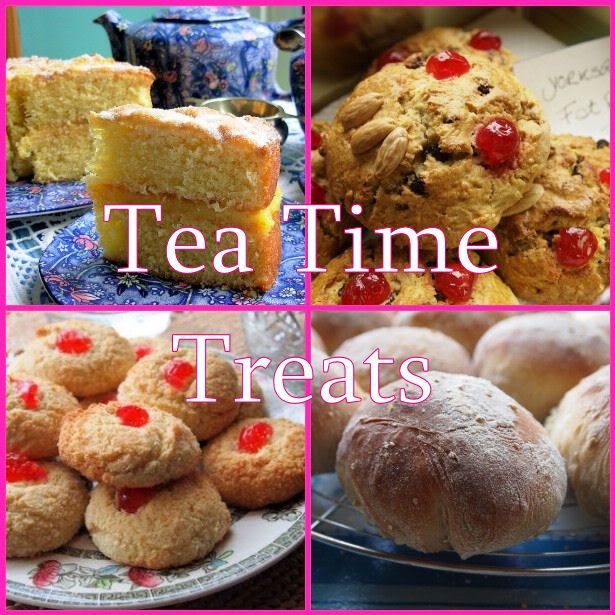
I am also entering this for not one, but two blog challenges!
The first is a regular challenge for me now and is this months Tea Times Treats run by Karen from Lavender and Lovage and Kate from What Kate Baked. This months theme is ‘romance’.
The second is my first entry to English Mum’s ‘Baked with Love’ bakeoff. I’ve just started reading this fablous blog and can recommend popping over for a look yourselves.

PS: Did any of you spot the sneaky pic of my very own Valentines pressie from my DH?
Disclaimer- I do not work for Baking Mad nor did not get paid to write this review.
Lamingtons
 After a very exciting day filming Baking Mad with Eric Lanlard yesterday, I came back to earth with a bit of a bump this morning. The school run was freezing, the washing mountain piled high and my baby boy not well at all. I still have a big smile on my face though and am so pleased that I went for it and enjoyed the experience. I feel even more inspired about my baking, which is amazing really given how much I loved it before. So today, to help with the reality blues I decided that a bit of baking was in order .
On Australia Day last week one of my Australian friends posted a picture of her lamingtons on Twitter and ever since I have been thinking about them. I have made them quite a few times before, but not for a while. If I had a Pinterest account I might have posted pictures of lamingtons on there, but I don’t (yet) so I made a mental note instead.
Lamingtons are essentially a plain sponge cut into squares, covered in chocolate and sprinkled with desiccated coconut. It’s not just any old sponge though, it is a sponge that is mostly eggs and flour, with a little bit of sugar and butter. The result is a sturdier sponge, (needed for the cutting into neat squares and then dunking in chocolate) that tastes amazing. A bit like a sponge/biscuit combo. The only thing that I can think of that compares is those little sponge fingers you can buy to make the base of your trifle with, except this sponge is not as crunchy as those by a long way.
There is no getting away from the fact that decorating lamingtons is a messy affair. Once dunked they need somewhere to ‘drip dry’ and the best place is on a cooling rack. My eldest daughter helped me with ours this evening. We had a lot of fun. It’s a great interpretation of messy play. As long as you don’t mind the licking of fingers, which will happen, my advice is to get stuck in and enjoy.
I should also mention that I have a special friend who moved to Australia last April for 3 years. I’m so proud of her for getting stuck into the Australian lifestyle and coping amazingly well with the change. So these cakes and this post is especially for Emily. I hope she makes some and can enjoy them too.
The recipe I use for reference is from Tanya Ramsay’s cookbook, Real Family Food’ (pg 224). I have made a few alterations for example, less chocolate icing because I had a fair bit left over when I made it to Tanya’s recipe, but that’s just my opinion. For tea time treat life saver, try making double the amount of sponge and freezing the extra squares until needed and icing them once defrosted.
What you will need
For the sponge
- 3 eggs
- 75g caster sugar
- 125g self raising flour
- 25g cornflour
- 3 tbsp hot water
- 25g unsalted butter, melted
For the chocolate icing
- 250g icing sugar
- 40g cocoa
- 7g unsalted butter, melted
- 110ml milk
- 25g desiccated coconut for sprinkling on top
Makes 16 squares
How to make:
- Preheat the oven to 180c/350f/gas 4
- Lightly grease a medium rectangle shaped tin (approx 18cm x 23cm) and line with greaseproof paper
- Mix the eggs together in a large bowl until thick and creamy and then add the sugar and mix until dissolved
- Sieve in the flour and cornflour, then add the water and butter and mix with until smooth
- Pour into prepared tin and bake for about 30 mins. Place on a wire cooling rack and allow to cool completely. Trim off any golden edges and then cut into medium sized squares. Though you might want to cut into smaller squares if you are making this mostly for kiddie consumption, or even use a cookie cutter for fun shapes, (although there will be some excess sponge with this option)

- For the chocolate icing sieve the icing sugar and cocoa powder into a large bowl, add the milk, water and butter and stir together until smooth. Then, put the bowl over a pan of hot water and stir again until silky and glossy. Add a dash more milk if you think it is looking a bit thick or stiff.
- Use a fork to hold the sponge squares and dunk into the chocolate icing until completely covered. Pull out and let it drip for a few seconds over the bowl and then place on a cooling rack and sprinkle with the coconut. Leave to set and then tuck in. These are best eaten on the day you make them but can be kept for up to 3 days in an airtight container.
 As the letter for the first ever AlphaBake blog challenge is ‘L’ it would be rude not to enter this blog post. The Alpha Bake challenge is hosted this month by Ros from The More Than Occasional Baker blog. Ros shares the hosting of this challenge with Caroline from Caroline Bakes blog. Looking forward to seeing all the other entries.


Shallot, Fig and Blue Cheese Tart Mixed With a Little Trip to London!
Only a quick post for you this week folks. For those of you that don’t know I and heading down to London on Monday to take part in Channel 4’s programme, ‘Baking Mad with Eric Lanlard‘. Filming is going to take place in Eric’s cake shop, Cake Boy and I will be competing with two other bakers in a mini bake off to win a masterclass with Eric afterwards. The theme is cheesecake, so as you can imagine I have cheesecake coming out of my ears at the moment with all of the practicing I have been doing. I have finally decided on what sort of cheesecake I am going to bake and am now concentrating on the decoration. I’m very excited and nervous all rolled into one!
I will be blogging the chosen cheesecake recipe in a few weeks, but today the recipe is for a fig, shallot and blue cheese tart. I made this tart a week ago as we were hosting a family party at my house and although I was not catering completely (everyone was bringing something) I was keen to try out something new. The other thing to say is that I LOVE figs, LOVE blue cheese and LOVE sweetly cooked onion so I was confident that this would get the big thumbs up from me. These flavours just go so well together. Sweet fig and shallot, against the salty blue cheese brought together with cream and eggs. Superb! But before I give you the recipe I wanted to list why I think savoury tarts are so special and definitely worth making from time to time.
- They are a great winter supper cooked with a jacket potato and your choice of veg
- Fantastic summer lunch served with salad and garlic bread
- Versatile – eaten all year round
- You can make double and freeze one (very handy mid week)
- Great party food (mine did not last 2 mins)
- Perfect for experimentation depending on what is in season and what your preferences are
- Easy to make, especially if you use shop brought pastry which is perfectly acceptable and totally allowed
Now that you are all convinced that savoury tarts are a good thing to make, have a go at this. You wont be disappointed.
This recipe was inspired from one I found on the BBC Good Food website, but I have made a few subtle but noticeable changes.
What you will need:
Pastry
175g plain flour
75g wholemeal flour
150g unsalted butter cut into small cubes
1/2 tsp salt
1 egg
Filling
400g shallots, peeled and finely chopped
few springs of fresh thyme
dash of olive and a small knob of butter
3 tbsp balsamic vinegar
4 eggs
200ml crème fraiche
200ml double cream
140g blue cheese (your choice)
3-4 fresh figs, cut in half
A 20-23cm tart tin, greased
How to make:
I’m going to explain how I make my pastry in the food processor. You can of course make it by hand, (or buy it) but this is so easy. In fact, I would argue that it is much less effort than getting out the house and going to the shop…or maybe that is just me with 3 kids in tow.
1. Put the flour, salt and butter into the food processor and mix until it looks like breadcrumbs. Add the egg and mix until a soft smooth dough is formed. Wrap in cling film and put into the fridge for at least half an hour. This pastry can be kept in the fridge for up to 4 days or frozen so a good one to make in advance.
2. Put the butter and olive oil in the saucepan, then add the shallots and thyme and start cooking on a low heat. After about 5 mins add the balsamic vinegar and cook for a further 10 mins stirring regularly until soft
3. Preheat you oven to 200c/400f/gas 6. Roll the pastry out on a lightly floured work surface, transfer to the tart tin, gently press the sides of the pastry into the tin, (to prevent it folding over in the oven) prick the base with a fork and blind bake with baking balls on top of greaseproof paper for 15 mins
4. Mix the eggs and cream in a large bowl, season and add the blue cheese. Once cooled add your shallot mixture and stir together.
5. Once pastry is blind baked, take out of the oven and turn oven down to 170c/325f/gas 3. Remove baking balls and greaseproof paper, then pour in your filling. Place your cut figs, inside up around the tart. Cook in the oven for about 50 mins – 1 hour until it as started to brown. It should still have a bit of a wobble when you take it out. It will continue to set as it cools.
 PS: I also did a review of some Valentines Chocs this week. Worth a read if you fancy putting some chocolates on your wish list for 14th Feb.
New Year Blog Challenge – Low Calorie Blueberry Muffins
 This week has been quite exciting. The people at Bakingmad.com were looking for food bloggers to take part in a new year healthy baking challenge. Always up for a challenge, especially a baking one I got in touch and they sent me a list of low calorie baking recipes and asked me to choose one to make and review. So I picked low calorie blueberry muffins because I was interested to see if a low calorie version would be just as good as the real thing.
A link to the recipe I used is here.
A few days later the postman knocked on my door and gave me a little cardboard box. Inside was a packet of Allinson’s nature friendly flour and packet of Silver Spoon half spoon sugar. When reading the small print on the packs I was pleasantly surprised at the reasons why the flour is branded nature friendly. It uses conservation grade wheat which is where farmers actively manage their farmland to promote bio-diversity and conditions where wildlife can flourish. I like the sound of that. But reading the back of the silver spoon half spoon sugar pack I was a bit disappointed to see that it contained artificial sweetener. Not something I really like to use if I’m honest, but then there is half the sugar required in this recipe to a normal blueberry muffin recipe (I checked) and so that is quite a bonus especially if you are on the dreaded new year diet.
 So today was the day I decided to complete the challenge. I set everything up and called my 6 year to see if she wanted to help. There is no electric mixer involved, just a little whisking and stirring, so she could pretty much do everything, which I think she found very rewarding. She took ages putting the batter in the cases and it was lovely to see her take care to do it properly and really get into the task.
They came out of the oven looking beautiful. Nicely risen with a few gorgeous purple blueberries bubbling at the surface. And I have to say they tasted pretty good too! They would certainly hit the mid afternoon ‘snack attack’ spot and I definitely did not feel quite as guilty eating one of these in comparison to a normal muffin or slice of cake. Might even pack one in my gym bag tomorrow as a treat for afterwards. I’m going to freeze a few too as I think they would be nice as an alternative to breakfast at some point in the week, especially if I’m running late and need breakfast on the go. My 6 year old loved them! She came through to the kitchen after eating one and said they were delicious! This is quite a compliment as she has a sweet tooth, so I guess she did not notice the fact that these had a lot less sugar in which is great.
Overall, I would say these are a quick and easy muffin recipe which is certainly worth a try. Next time I’m tempted to swap the flour to wholemeal self raising and to try it with the same amount of normal sugar to see how that tastes and turns out. Anyone gets there before me let me know.
Disclaimer- I do not work for Baking Mad nor did not get paid to write this review.


