Jubilee Themed Bake Club and ‘Bake it Pink’ for June

I can’t quite believe that my 3rd Bake Club has been and gone already. I’ve had such fun organising them and meeting lots of new people who have a passion for baking just like me. We always end up chattering away and losing track of the time.
This month the theme was ‘Queen’s Jubilee’, which is rather helpful of course as this links in very nicely with the Jubilee Competition that I am running on my blog at the moment. So I’m hoping that a round up of all the cakes might help to give you a little bit of inspiration to get baking. After all a bank holiday is the perfect time to get into the kitchen with the additional day off. As usual my guests completely exceeded my expectations with their creations. All fabulous and suitably regal. So if you are ready, lets indulge.
First up was Christina’s fruit decorated chocolate fudge cake. Christina tells me that she got the recipe from this months Good Housekeeping. She halved the quantities because it said the cake would serve 40!!! As you can see it was still pretty sizable, but a much more manageable. It was chocoholics dream with the rich chocolate sponge and white chocolate buttercream and it tasted amazing.

Then came Abi’s orange flavoured crown cake with fresh fruit, white chocolate and raspberry coulis. Abi explained that she had combined a number of recipes to make the various parts to this cake. The orange taste was incredible. You could really taste fresh orange with every bite. I love the idea of using sponge fingers around the cake too.

Then Vicky brought a Almond and rhubarb loaf cake made with rhubarb from her own garden. Now you can’t get more British than that! The flavours were gorgeous. I could really taste the almond and cinnamon that had been added.

Lastly, there was my white chocolate and elderflower victoria sponge cake. I used a Nigella victoria sponge cake recipe, (which can be found on pg 26 of her cookbook, How to Eat) and added 2 tbsp of elderflower cordial to the cake batter and 3 tbsp of cordial to the fresh cream that I whipped up to fill and top the cake with. I also drizzled melted white chocolate on the cream in the middle of the cake and again in the top. Don’t hold back with the white chocolate, just go for it. The little white chocolate crowns were an idea I got from talented Sew White. You can see a little video on how to make them here. They were great fun to do and I was very pleased with the final cake.
As June is the perfect time to hunt for fresh elderflower you could always make your own cordial. I will be doing this for sure. Karen from Lavender and Loveage has a great recipe over on her blog.

Next Bake Club and New Ideas
I’m feeling more experienced now having run 3 Bake Clubs and it’s been great getting a feel for what people want and how they run. I’ve had a few ideas which I hope will make my Bake Club even better than before. Let me know what you think.
- Running a charity Bake Club twice a year, starting next month. On the 13th June the theme is ‘bake it pink‘ and all entrance fees will be going to a Breast Cancer Care. My very good friend Anna will be coming along to support the evening. Anna found out late 2010 that she had breast cancer and endured an incredibly hard year battling the disease. Her strength and courage has been an ongoing inspiration to me and I tell her on a regular basis that I think she is amazing. She has even signed up to do the London Marathon next year! There will be some time allocated to allow Anna to share her experience and talk about breast cancer awareness on the night.
- Organising a number of talks/presentations for the next few Bake Clubs, as I really think there is room for everyone to learn more from each other and from any special guests that I might get in. I’m not talking anything that will take away too much time, just 20 mins focusing on a particular baking related subject. For example at either the July or August Bake Club one guest has already offered to share her macaroon tips.
- Investigating avenues to donate any left over cake to a local old people’s home if guests do not wish to take all the cake home with them.
How to book for the June charity Bake Club:
Here are all the details you need, but essentially all you need to do is drop me a line at: homemadebyfleur@gmail.com

Bake Club dates for your diary:
- 18th July 2012
- 29th Aug 2012
Both based in Sevenoaks
Finally, the great thing about my white chocolate and elderflower victoria sponge cake is that I can also enter it into two blog challenges this month. Tea Time Treats hosted by Karen from Lavender and Lovage and Kate from What Kate Baked has gone all floral this month so the elderflower in my cake certainly counts there. Also, the Forever Nigella blog challenge created by Maison Cupcake and hosted this month by Nelly’s Cupcakes has a Jubilee theme. So thank you to Nigella for the fantastic and extremely easy sponge recipe which made a fab base to my cake and qualified me to enter Forever Nigella this month.


Individual Pistachio and Rose Celebration Cake with Pink Champagne Buttercream
 My blog is 6 months old on the 10th April! It only seems like yesterday that I was sitting on this very same chair at my computer wondering if I should take the plunge and start my own blog. I was scared. Mostly of opening up a window into my life for others to see. What would people think of me? What if nobody read my blog? Why would anyone want to read about me? But deep down I had a bubble of excitement. I could imagine how wonderful it would feel to inspire others to bake and maybe people would like what I write and enjoy reading it! So I went for it and it’s safe to say I have not looked back.
In the 6 months of writing my blog, I feel like I have come so far. I had no idea how much fun it would be or how I would feel writing about something I love in my own way without any rules. I have had unwavering encouragement from my family and friends and I have made so many new friends both online and face to face. There is a fantastic blogging community out there which is incredibly supportive, and I have loved becoming part of this. Planning my posts, baking, photographing what I have made and writing about it is now a very important part of my week. People often ask me where I want to go with this blog, and although I can’t give a precise answer, I do know that it is a fabulous adventure which keeps getting better and I am thoroughly enjoying the ride.
One thing I have learnt in the last 6 months, is that the blogging world is full of awards. Which is a great because whilst writing a blog is a fantastic thing to do, it is also a lot of hard work behind the scenes. I have had many late nights baking, writing, formatting and organising blog posts to ensure that my blog is the best I can make it. I’m a bit of a perfectionist!
Many of these awards are based on votes from readers, and I kind of wish they weren’t as I’m just not used to canvasing for votes. However, last week I found out that I have been shortlisted out of 12,000 nominations for the ‘Tasty’ category in the Britmum’s Brilliance in Blogging awards which I am so chuffed about, I just could not keep it quiet.
So firstly I need to say a big thank you to everyone who nominated me in the first instance. It feels amazing to have made the shortlist it really does. I am 1 of 20 shortlisted blogs in this category. The next stage is to become 1 of 8 finalists which would mean an invitation to an awards ceremony in London, (and therefore a new dress) where a panel of high profile judges pick the final winner. Being a finalist would be incredible. Just having that recognition for my blog would be such an achievement and would mean lots of new and exciting exposure for my blog.
But I’m not just going to ask you to vote for me, I’m going to give you good reason to take the time and vote for me. In celebration of my blog being 6 months old and for making the Brilliance in Blogging shortlist I have created the most scrumptious celebration cake you ever did see (and taste). Inspired by my favorite summer flower, my love of pink champagne and a my very dear friend Anna (because its pink and has champers in it) I have come up with a cake that will make any celebration one to remember. I made it mini sized because that was perfect for me, and it is my celebration cake after all. But also I think there is something special and understated about making an individual sized cake for someone. It’s not over the top, yet all the effort and sentiment is still there in extremely cute proportions.
How to vote:
So here is how to vote if you would like to. Click on the BIB logo below and you will be taken to a survey monkey form. Scroll down to the ‘Tasty’ shortlist (it’s not that far down, category number 2) and click next to Homemade By Fleur. Scroll to the bottom and click submit and that’s it. A big thank you to anyone in advance who votes xxx I’ll let you know how I get on.

Recipe: Mini Pistachio and Rose Celebration Cake with Pink Champagne Buttercream
What you will need:
Cake:
- 2tsp rose syrup (I used Star Kay white rose water)
- 120 ml whole milk
- 120g plain flour
- 100g sugar
- 1.5 tsp baking powder
- 40g unsalted butter
- 30g pistachio nuts (25g for cake, 5g for decoration on top) finely chopped. I put mine in the food processor for 1-2 mins
- 2 x 11cm sandwich cake tins greased and lined
- large metal spoon
Pink Champagne Buttercream
I prefer not to have too much buttercream on my cake, but if you like lashings of it, you might want to double these quantities.
- 40g unsalted butter
- 165g icing sugar
- 25ml pink champagne (there should be plenty left in the bottle to pour yourself a glass once you have finished the cake :-))
- Pink food colouring (optional)
- Palette knife
Iced roses
- 150g royal icing sugar
- 1-2 tsp water
- Pink and green food colouring (most supermarkets sell natural colours although I did not use them on this occasion)
- Small rose and leaf icing tips
- Icing bags

How to make:
- Preheat your oven to 170c/325f/gas 3
- Put the flour, sugar, baking powder and butter in an electric mixer and combine with a paddle attachment until thoroughly mixed in and has a sand like consistency
- Slowly add the milk, then the rose water, then the eggs
- When you have a smooth batter, fold in the chopped pistachio with a large metal spoon ( remember to save a bit for the decoration)
- Divide the batter between the two cake tins, gently smooth over and put in the oven for 25-30 mins. To check that they are done stick a knife in both cakes and it will come out clean if baked. If not, pop back in for another 5 mins
- Let the cakes cool in the tins for 5 mins, then turn out onto a cooling rack
- Whilst cooling you can make the buttercream. For this just add the icing sugar and soft butter to a bowl and start to mix with an electric mixer. Then add the champagne slowly. Once all the champagne has been added, add a few drops of pink food colouring. I just did one drop at a time as I knew I wanted a light pink. Once you are happy with the colour, continue to mix the buttercream for another 5 mins or so. This step is quite important as it stops your buttercream from being grainy and gives it a light fluffy texture
- Once your cakes are cool slice off any bumps that have risen up on the top of each sponge. Then slice each sponge in half lengthways. Then fill each layer with butter cream and build up your 4 layer cake.
- Then use a small palette knife to cover the outside of the cake with the remainder of the buttercream. I used upwards motions in the side of the cake
- Sprinkle your remaining chopped pistachio around the top of the cake, then make your royal icing by mixing the royal icing sugar and water together until it forms soft peaks. It is probably best to add the water slowly and watching the icing come together. You may need a little less or more water than I have suggested
- Divide your royal icing into two and colour one dark pink and the other one green. To make a rose I watched a couple of You Tube videos, this video is a good one. Essentially you start with the fat part of the icing tip at the bottom and pipe a small closed circle. In some videos they used a flower pin to do this, I just had my cake on a turntable and moved it round as I went. You then start to add on the petals piping 3 around on the first layer and then 4/5 on the second layer. I does not look like a rose to start with but quickly becomes recognisable. I needed a few practice goes first and I piped mine straight onto the cake when I was ready.
- To create leafs, just point the leaf tip close the rose, flat side down and pipe out some icing pulling away as you do and stop piping when it is big enough pulling high to break the icing off
- Give to someone very special and make their day x
If you are inspired by this cake you must also check out fellow blogger Cakeboule’s Tiffiany inspired champagne layer cake. It’s stunning.

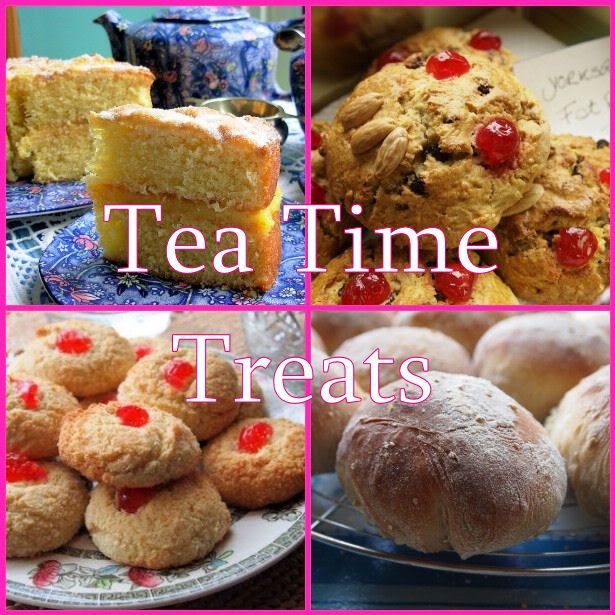
I’m also going to send this over to Kate from What Kate Baked to enter the Easter themed Tea Time Treats. This challenge is shared with Karen from Lavender and Lovage. As Easter is a celebration and a time for getting together with the family I think this little cake would make a lovely addition to any table of treats over the Easter weekend.
Crazy Scone Challenge!
 In the blurb about my blog you will see the words “for busy mums who want to use their creative side”. Well this post is written with that specifically in mind. Yesterday after picking my eldest from school, rushing home, giving all three their tea then dropping eldest at Rainbows, I had 40 whole minutes until I had to pick up. Wow, that is quite a chunk of time for someone like me. I did not want to waste it so I carefully considered what to do. There were lots chores that I could have done like fold the washing, tidy the bedrooms, order my food shop or make some calls but instead I decided to set myself a challenge, and see if I could bake something in that time. ‘Crazy” I hear you say! Yes, I might agree with you there, after all I did not list the obvious option of sitting down and having a cup of tea but once I had the challenge idea in my head, there was no going back, I had to do it.
The requirements were quick, easy and something that the kids would like. Lots of scope there and after a rummage through my fridge and cupboards the decision was made. Little scones with feta, sundried tomato and caramelised balsamic onion. Sweet, salty and tangy all at the same time, making these just a little bit more sophisticated than your average savory scone. You might already know this about me, but I like to create mini sized food. In this case I think the small size makes the scones much more versatile. They are perfect for snack time, picnics (can’t wait now that the weather is improving) jazzing up your lunch and can even be made as little canapés served with chilli jam maybe? They freeze well and can be defrosted and warmed up in a jiffy by using the microwave.
Little scones with feta, sundried tomato and caramelised balsamic onion
Here’s what you will need:
- 200g self raising flour
- 1/4 tsp salt
- 40g/1 1/2 oz butter
- 100ml (3 1/2 fl oz) milk and a little bit extra for brushing the tops of the scones
- 6 sundried tomatoes
- 25g feta cheese
- 1 med onion chopped up finely
- 1 tbsp olive oil
- 1/2 tbsp sugar
- 1 tbsp balsamic vinegar
- Small scone cutter
- Greased baking tray
- Pastry brush (I use a silicone one and think they are fab)
Makes about 18 mini scones
So the big question now, is did I manage to make them in the 40 minutes? Well here is how I got on.
How to make:
Time: 40 mins
- First thing I did was to chop the onions up and I did this in my magimix as if I’m giving onion to the kids it has to be really small
- Then I put the chopped onion in a small saucepan with the olive oil and let it cook on a low heat for about 5 mins. I then turned the oven on to 220c/gas 7.
- After 5 mins, add the vinegar and sugar to your onions. Stir regularly and keep on a low heat
Time: 31 mins to go
- Now I put the sundried tomatoes and feta cheese in the magimix and whizzed for about 5 seconds, until a rough paste is made. I kept this to one side and started to make the scones

- In a big mixing bowl add the flour and butter. Mix together either by hand by rubbing through your fingertips, or in the mixer until it looks like breadcrumbs. Add the tomato and feta paste along with the onions which should by now have had about 15 mins to cook in the saucepan and should be nice and soft and have absorbed the sugar and vinegar

Time: 22 mins to go
- Mix the dry ingredients in, and once combined slowly add the milk and mix until a soft dough is formed
- Take the dough out of the bowl and onto a lightly floured surface. Lightly knead and then roll out. Make sure that the dough rolled out thickly (about 3 cm) as this is the secret to lovely high scones. Cut out the scones and place on the baking tray. Bring leftover bits of dough together and roll out again until all the dough is used up


Time: 13 mins to go
- Brush the tops with milk and place in the oven for 10-11 mins until the tops are golden


As soon as the scones came out, I turned off the oven, placed them onto a cooling rack and ran out the door to do the pick up. I did not have time for the washing up so left the kitchen like a bit of a bombsite.

However, most of it went in the dishwasher, and I had ‘ warm from the oven’ scones to munch on whilst I was doing it. Not so bad after all!
I’m hoping that anybody out there who feels they don’t have time to bake will be inspired by my ‘Crazy Scone Challenge’ and find 40 mins today or tomorrow to get stuck in and create a little something that has the potential to make your day as these little beauties certainly made mine.

These scones can also be entered into the Tea Time Treats blog challenge which is savory or sweet scones! This month the challenge is hosted by Karen from Lavender and Loveage and is shared with Kate from What Kate Baked.
Mini Cupcakes for Valentines Day
 I know this is my second Valentine inspired post, (first one being my packed lunch made with love) but I just could not resist and think you might like it.
Cupcakes look amazing, there is no doubt about that, but for me the mountain of buttercream icing is a bit too much. However, give me a bite-sized version and everything changes. I’m quite happy to indulge in a completely guilt free fashion, and maybe even pop a second in for luck. Well they are only little so why not? Mini cupcakes can look just as amazing as bigger ones, and their size demands attention because they just look so cute. If you get creative in the way you present them, there is definite potential for the ‘wow factor’.
When I found out I was picked by Bakingmad.com as one of 15 bloggers to bake in their Valentine competition, I immediately started to think about how I could create an extra special entry which would include a few mini cupcakes. After all the brief was to make something I would want to receive myself! A few days later the idea of a mini cupcake selection box came to me. This is my alternative to the traditional box of chocolates that might get given on Valentines I guess, but much more thoughtful and definitely more memorable. I was thrilled with how the end result looked. Even better than I had imagined. I think these would be perfect for a birthday gift or any other occasion too.
So what flavours did I pick with so many to choose from? Here are my final four:
Hazelnut and chocolate: two of my favourite flavour combinations
Strawberry and white chocolate: it’s valentine’s after all so a bit of pink had to feature somewhere
Green tea: this is my experimental side coming out. I love the taste of these and the green colour that is totally natural
Peanut Butter: a bit of fun, and my daughters LOVE peanut butter
It is easy to change any of these (if you would like) to a flavour that you would prefer. Just put a quarter (from the recipe you use) of any ‘flavour’ ingredient in the cake batter mix and give it a whirl.
Makes 24 mini cupcakes and a few regular sized ones as well.
What you will need:
Basic cake batter
- 240g plain flour
- 200g sugar
- 3 tsp baking powder
- 80g unsalted butter, room temperature
- 240ml whole milk
- 2 eggs
- 1 tsp vanilla paste
Flavour ingredients
- 1 tbsp crunchy peanut butter
- 2 tbsp white chocolate chips
- 5g cocoa powder
- 1 tbsp nutella
- 1 tsp green tea matcha power
Icings and decoration (for the mini cupcakes, I just used more of the chocolate melt to cover the bigger ones I made as well)
I used a lot of Silver Spoon products as Baking Mad were kind enough to send me a selection for use in the competition, but you can get creative with any sprinkles or icing you might have in the cupboard already.
- half a pack of Silver Spoon strawberry chocolate buttons
- 1 pack each of Silver Spoon white and dark chocolate easy melt (you won’t use a whole pack but can seal up with a freezer clip and use another time)
- 1 Silver Spoon giant white chocolate snowie chopped up (I actually love these as the chocolate is lovely and they are really colourful so I’m sure the rest of the pack will get used up pretty quickly)
- a sprinkle of Silver Spoon chocolate heart duos and hundreds and thousands
- Sprinkle of chopped hazelnuts
- 125g icing sugar
- 40g unsalted butter, room temperature
- 15ml of whole milk
- 1 tsp green tea matcha powder


You will also need a 24 hole mini cupcake tin and cases, piping bag and piping nozzle (I use the Wilton M1 nozzle), old small box (I used an empty chocolate box)
How to make:
- Pre-heat the oven to 170c/325f/gas 3
- Put the flour, sugar, baking powder and butter in a freestanding electric mixer with a paddle attachment and mix until fully combined with a breadcrumb like consistency
- Put the milk, vanilla paste and eggs in a measuring jug, lightly whisk with a fork and add slowly to the dry ingredients in the mixing bowl and mix until smooth
- Divide the mixture into four separate bowls and add the nutella and cocoa to one, matcha powder to another, peanut butter to another and white chocolate chips to the final bowl
- Fill up 6 of the cases 2/3 full with each of the mixtures (any left over mixture put into large cases or make more little ones)
- Bake in the oven for 10-12 mins (any bigger ones you make will need 20 mins)
- Whilst baking, I made the green tea buttercream by putting the butter, icing sugar and milk in a freestanding electric mixer with a paddle attachment and mix slowly to start (icing sugar will fly everywhere otherwise) and then quicker until smooth. This normally takes at least 2-3 mins of mixing to get it smooth
- Once cakes are out and cooled you can start the really fun part and decorate them
- I put the white chocolate easy melt onto the peanut butter cupcakes and topped with small pieces of the white chocolate snowie. You have to work quick with the easy melt as it dries and hardens pretty quickly. I used a palette knife to spread it on
- I put the dark chocolate easy melt on the chocolate and hazelnut cupcakes and sprinkled with chopped hazelnuts and a bit of gold edible glitter
- I spread melted strawberry chocolate buttons on the white chocolate chip cupcakes, then sprinkled with hundreds and thousands and for a final valentines touch added a chocolate heart
- And for the green tea cupcakes I put the buttercream in a piping bag, iced starting on the outside working in to make a little swirl, and the same the strawberry cupcakes, finished with a chocolate heart
- To present I put 16 of my mini cupcakes in an empty box that used to have Christmas chocolates in and tied a pink ribbon round it

I am also entering this for not one, but two blog challenges!
The first is a regular challenge for me now and is this months Tea Times Treats run by Karen from Lavender and Lovage and Kate from What Kate Baked. This months theme is ‘romance’.
The second is my first entry to English Mum’s ‘Baked with Love’ bakeoff. I’ve just started reading this fablous blog and can recommend popping over for a look yourselves.

PS: Did any of you spot the sneaky pic of my very own Valentines pressie from my DH?
Disclaimer- I do not work for Baking Mad nor did not get paid to write this review.


