Time for a change…
Just a quick post to let you all know that Friday is a pretty big day for my little blog as it’s goodbye to ‘Homemade by Fleur’ as you know it and hello to a snazzy new look and self hosted blog! Behind the scenes my brother (who’s pretty clever when it comes to things like this) and I have been working hard. There have been quite a few late nights, but it’s been great fun and I am so excited to show it to you.
I wanted to mention a couple of things that will change as a result of moving across to the new blog.
Firstly, there will be a new web address for my blog. A redirect from the old site will be in place so you will get taken straight to it if you go to the old address but it might be worth making a note of the new address on Friday and using that as much as possible if you can.
Secondly, all my WordPress blog subscribers (ie if you have your own wordpress blog and have subscribed to my blog) will need to re-subscribe on my new blog. It’s a bore I know, and I’m really sorry about having to ask you to do it. It’s just one of those annoying technical hiccups that cant be avoided. Look out for the subscribe box in the top right hand corner of the new blog. It only takes a minute to re-subscribe, and is very quick and painless I promise. I hate the thought of losing any of you through the moving process so would love you hook up with the new blog too if you can.
The good news is that all my email subscribers (ie if you don’t have a wordpress blog) will be moved across and automatically subscribed to my new blog. Phew!
So I look forward to welcoming you on Friday to my new blog. I will be posting a big hello so look out for that on Twitter and Facebook. I also have a cheeky giveaway to celebrate the launch.
Fleur x

Toblerone Inspired Dinner Party Dessert
 I stayed up until 3am last Sunday morning. GASP!!! For anyone who knows me, this is quite an achievement. I usually get to about 10.30pm on an evening out and start yawning, then by 11pm I’ve firmly got my going home hat on, and that’s it, the night over. But on Saturday I was having such a great time that I forgot about the fact that my children would be waking up in 6 hours…5 hours…4 hours and was happy to keep going. I bet you are all wondering what I was up to. Well, hubby and I, along with 3 other couples have been taking part in our own ‘Come Dine With Me’ dinner parties. Last week we went to CDWM No: 3…and it was brilliant! The theme was ‘The Oscars’ and I just LOVED getting dressed up. Our hosts had even laid out the red carpet for our arrival, and placed a champagne saucer of pink bubbly in our hands as we walked in. I felt famous, just for a split second.
We were actually first to host a couple of months back and decided to have a Mexican themed night. I had no idea that there would be such a market for Mexican style partyware, but I was amazed at the choice. I think my favorite purchase was the inflatable cactus. The only down side being, it has no further use at all! I mean where does one store an inflatable cactus? It looked fab in our dinning room on the night though. The second CDWM had an Olympic theme which had us all dressed up in red, white or blue and taking part in various party games. Such a great night.

These evenings have been really successful so we have agreed that after the last one next month, we are all going out for a meal together over the summer and then we will be starting CDWM season 2 in the autumn. So I’ve got my thinking cap on already for themes, food and entertainment to make our next one even better than our last one.
I want to create my own dessert next time round, (for extra wow factor) so it’s with thanks to the Alphabake challenge hosted by Caroline Makes and Baking Addict and the We Should Cocoa challenge hosted this month by Laura from How to Cook Good Food and organsied by Chocolette that I have come up with a Toblerone style dessert. It contains the required almonds and chocolate for We should Cocoa, and the ‘H’ ingredient is honey for Alphabake.
I have to say that this was a complete experiment right up to the point of the finishing touches. I had imagined in my head that I would cover the cake with a ganache that would make it look more like a triangle of Toblerone, but I ended up with a chocolate sauce so went with that and I think it worked really well. The final dessert had a gorgeous stickiness to it a bit like a sticky toffee pudding, and served with the ice cream, I was in heaven.

Toblerone Inspired Dinner Party Dessert
What you need:
Cake
- 125g butter
- 125g caster sugar
- 1 tbsp honey
- 115g self raising flour
- 25g cocoa
- 1 tbsp milk
- 25g toasted flaked almonds (and a few extra for decoration)
- 70g chopped nougat

Chocolate sauce
- 75g milk chocolate
- 100ml double cream
- Medium sized traybake tin (mine was 27cm x 21cm) greased with the bottom lined
- Serves 8 (based on a few people having a second helping)
What to do
- Pre heat the oven to 180c/350f/gas 4.
- Put butter in a mixing bowl and beat with an electric mixer until pale and creamy. Add sugar and beat until fully incorporated. Mixture should have a light and fluffy texture
- Gradually add eggs and honey beating after each addition. Sift in flour and cocoa and add milk then fold in with a large metal spoon
- Once the flour and cocoa is almost folded in add the nougat and almonds and gently mix in
- Pour mixture into the traybake tin, and gently smooth down. Pop in the oven for about 20 mins until a knife comes out clean
- Remove cake from the tin and cool on a rack
- Once cool, cut the cake into 6 even squares. Then cut each square diagonally to make 2 triangles. Find a rectangular shaped plate or tray and line up the triangles as in the pictures
- To make the chocolate sauce, melt the chocolate and cream together in a bowl over simmering water. Mix with a spoon to incorporate and drizzle over the cakes
- Use the reserved almonds to decorate the sides of each triangle and serve with a scoop of vanilla ice cream


Jubilee Cooking Masterclass

I just love the picture above. Whilst I adore baking, I am also a massive fan of fresh green vegetables and every time I look at this picture my mouth waters. If I concentrate for long enough I can even taste those gorgeous peas and fresh mint. Maybe the reason for this is because it was only last week when I was tasting these ingredients at a Jubilee cooking masterclass organised by Tesco Real Food. I casually dropped that in there, but I can’t tell you how excited I was to be invited. Not only did the evening sound like my perfect night out, but they picked me because they liked the look of my blog, and that is a massive compliment. Think my smile says it all…

So last Wednesday I spent all day getting everything sorted for the babysitter to come at 5.30pm. My day was meticulously planned and during the final hour when I had the most to do my youngest daughter managed to smash a glass with squash in it all over the kitchen and whilst I was clearing that up my 18 month old was scribbling black felt pen on my cream living room curtains. It all got a bit stressful but I managed to catch my train with one minute to spare and thoroughly enjoyed the ride into the big smoke. It did not take me too long to leave my day behind and I got off the train feeling a bit more like Fleur rather than stressed Mummy.

Tesco Real Food is a free foodie magazine that you can pick up at your local Tesco store, and to celebrate the Jubilee they have published a special edition with a selection of Jubilee street party recipes. At the masterclass myself and 4 other bloggers got to cook 5 of the featured recipes. Here’s who did what:
- Chicken tikka drummers (Kerry who writes Multiple Mummy)
- Coronation coleslaw (Tara who writes Hanwell Nest)
- Red, white and blue trifle (Claire who writes Crumbs)
- English breakfast quiche (Michelle who writes Utterly Scrumptious)
- Three pea and wensleydale salad (me :-))
All recipes can be found via this online edition of the Real Food magazine

After a introductory chat with Rosalind Rathouse the founder of The Cookery School where the event was being hosted, we set to work under her watchful eye. This was actually my second visit to The Cookery School having been there the first time to take part in the Katie Fforde Recipe for Love bake off, and I was not disappointed. Rosalind was a fountain of knowledge and casually worked alongside everyone making sure that all 5 dishes were being made in the correct way at the right time. She even showed us how to make fresh custard, a fatless sponge and shortcrust pastry. All of which take literally take 5 mins to make. Rosalind also impressed me by staying cool as a cucumber when I informed her that I was vegetarian. She came up with ways in which a vegetarian version of all the recipes could be made without any hesitation at all.

One of the highlights for me was bringing all our dishes together on the table and tucking in with a glass of wine to wash it all down with. It was a great selection of food. My favorite being the salad, (of course). It was so easy to make and I would never have thought to use so many types of pea in one salad. We actually ended up blanching the little peas just to give a slightly different flavour and texture to the salad which I think was an improvement on the recipe. I liked it so much that I ended up going back to the bowl for another helping more than once! The quiche was also delicious. It had tomato sauce spread on the bottom of the pastry before the egg mixture went in and I though this was a super idea. You could really taste the tomatoes which was a great flavour combination with the egg and mushrooms. Then there was the trifle. Our version had the homemade custard and with all the fresh fruit too, it was simply divine.


I have to say I was very impressed with whole evening and the food especially. When the invite came entitled ‘Jubilee Street Party Cooking Masterclass’ I was expecting a sausage roll to feature somewhere, but not one in sight…thank goodness. I also loved meeting the other bloggers. So refreshing to talk face to face and get to know each other that way.

One final thing to mention is that Tesco Real Food would love people to upload any of their Jubilee street party food to the community section of their website. Anyone who does upload a recipe will go in a draw to win prizes including the weekend cookery course for two at the Ashburton Cookery School, so I thought it was definitely worth mentioning. I shall be uploading my elderflower and white chocolate victoria sponge recipe as soon as I get this blog post published.
With thanks to the lovely Sarah from Cedar, Tesco Real Food and The Cookery School.
P.S. Behind the scenes I’ve been working really hard with my lovely brother Liam as we are creating a new look ‘Homemade by Fleur’ blog. I’m taking the plunge and moving to self hosted and I’m getting myself a little redesign in the process. Look out for the big reveal in a couple of weeks!
Jubilee Themed Bake Club and ‘Bake it Pink’ for June

I can’t quite believe that my 3rd Bake Club has been and gone already. I’ve had such fun organising them and meeting lots of new people who have a passion for baking just like me. We always end up chattering away and losing track of the time.
This month the theme was ‘Queen’s Jubilee’, which is rather helpful of course as this links in very nicely with the Jubilee Competition that I am running on my blog at the moment. So I’m hoping that a round up of all the cakes might help to give you a little bit of inspiration to get baking. After all a bank holiday is the perfect time to get into the kitchen with the additional day off. As usual my guests completely exceeded my expectations with their creations. All fabulous and suitably regal. So if you are ready, lets indulge.
First up was Christina’s fruit decorated chocolate fudge cake. Christina tells me that she got the recipe from this months Good Housekeeping. She halved the quantities because it said the cake would serve 40!!! As you can see it was still pretty sizable, but a much more manageable. It was chocoholics dream with the rich chocolate sponge and white chocolate buttercream and it tasted amazing.

Then came Abi’s orange flavoured crown cake with fresh fruit, white chocolate and raspberry coulis. Abi explained that she had combined a number of recipes to make the various parts to this cake. The orange taste was incredible. You could really taste fresh orange with every bite. I love the idea of using sponge fingers around the cake too.

Then Vicky brought a Almond and rhubarb loaf cake made with rhubarb from her own garden. Now you can’t get more British than that! The flavours were gorgeous. I could really taste the almond and cinnamon that had been added.

Lastly, there was my white chocolate and elderflower victoria sponge cake. I used a Nigella victoria sponge cake recipe, (which can be found on pg 26 of her cookbook, How to Eat) and added 2 tbsp of elderflower cordial to the cake batter and 3 tbsp of cordial to the fresh cream that I whipped up to fill and top the cake with. I also drizzled melted white chocolate on the cream in the middle of the cake and again in the top. Don’t hold back with the white chocolate, just go for it. The little white chocolate crowns were an idea I got from talented Sew White. You can see a little video on how to make them here. They were great fun to do and I was very pleased with the final cake.
As June is the perfect time to hunt for fresh elderflower you could always make your own cordial. I will be doing this for sure. Karen from Lavender and Loveage has a great recipe over on her blog.

Next Bake Club and New Ideas
I’m feeling more experienced now having run 3 Bake Clubs and it’s been great getting a feel for what people want and how they run. I’ve had a few ideas which I hope will make my Bake Club even better than before. Let me know what you think.
- Running a charity Bake Club twice a year, starting next month. On the 13th June the theme is ‘bake it pink‘ and all entrance fees will be going to a Breast Cancer Care. My very good friend Anna will be coming along to support the evening. Anna found out late 2010 that she had breast cancer and endured an incredibly hard year battling the disease. Her strength and courage has been an ongoing inspiration to me and I tell her on a regular basis that I think she is amazing. She has even signed up to do the London Marathon next year! There will be some time allocated to allow Anna to share her experience and talk about breast cancer awareness on the night.
- Organising a number of talks/presentations for the next few Bake Clubs, as I really think there is room for everyone to learn more from each other and from any special guests that I might get in. I’m not talking anything that will take away too much time, just 20 mins focusing on a particular baking related subject. For example at either the July or August Bake Club one guest has already offered to share her macaroon tips.
- Investigating avenues to donate any left over cake to a local old people’s home if guests do not wish to take all the cake home with them.
How to book for the June charity Bake Club:
Here are all the details you need, but essentially all you need to do is drop me a line at: homemadebyfleur@gmail.com

Bake Club dates for your diary:
- 18th July 2012
- 29th Aug 2012
Both based in Sevenoaks
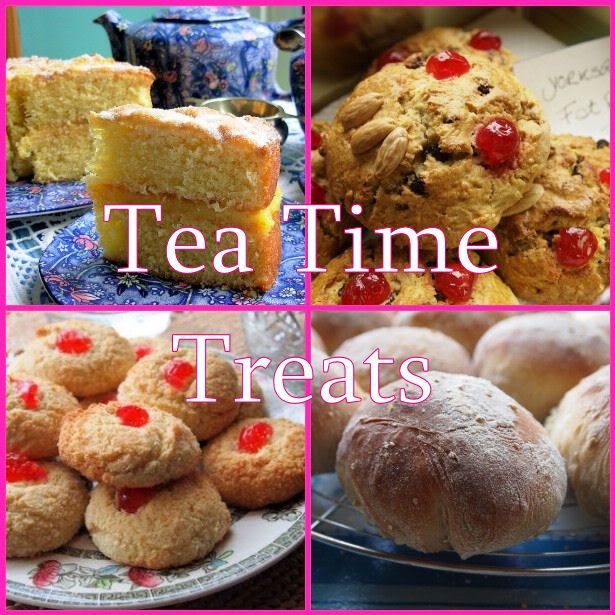
Finally, the great thing about my white chocolate and elderflower victoria sponge cake is that I can also enter it into two blog challenges this month. Tea Time Treats hosted by Karen from Lavender and Lovage and Kate from What Kate Baked has gone all floral this month so the elderflower in my cake certainly counts there. Also, the Forever Nigella blog challenge created by Maison Cupcake and hosted this month by Nelly’s Cupcakes has a Jubilee theme. So thank you to Nigella for the fantastic and extremely easy sponge recipe which made a fab base to my cake and qualified me to enter Forever Nigella this month.


Blogging Jubliee Baking Competition & Vintage Union Jack Flag Biscuits

Hands up who got excited about the Royal Wedding last year and all the baking that happened as a result? My hand goes straight up because I certainly did. We hosted a party at our house and I was in my element planning for it and baking lots of gorgeous treats to serve my guests. Luckily, for us keen bakers there is the Queen’s Jubilee to celebrate this year which means more street parties and family gatherings to bake for. Hip, hip hooray!
In preparation for the Jubilee I started to scan the internet to see what recipes I could find to inspire me and I have to say, I have been disappointed. All I could really find was red, white and blue cupcakes or crown shaped biscuits. That’s all fine, but I was looking for something a bit more original. So I was thrilled when Appliances Online agreed to sponsor a Jubilee Baking Competition on my blog.
I am looking for any bloggers out there to make their best Jubilee themed cakes and bakes and enter them into my competition so I can create a real treasure trove of inspirational ideas. I want you to be as creative and unique as you possibly can. Anything goes! I shall do a round up post of all the entries when I announce the winner.
The judge for this competition is fellow blogger Vanessa Kimbell. Vanessa is quite an inspiration to me. Her first cookbook ‘Prepped‘ was published 6 months ago, she has her own Sunday morning radio show on BBC Northamptonshire, she runs a ‘pop up’ bakery in her front garden each Saturday with her children and she writes popular blog, ‘ Goddess on a Budget‘. I know that Vanessa has the perfect eye for judging this kind of competition and I’ve no doubt that she will pick a worthy winner.
The deadline for entries is 3rd June 2012 and one lucky winner will get £100 of Amazon vouchers, provided by Appliances Online. Think of all the lovely baking accessories or cook books you could buy for that!
Competition Rules of Entry
Main Entry – Blog post
- Your Jubilee cake or bake needs to be featured on one of your posts. Tell your readers that it is for the Homemade by Fleur, Blogging Jubilee Baking Competition with a link to this post (http://wp.me/p1UMex-o3) which tells them all about it
- You also need to mention that Appliances Online are sponsoring the competition and include this link (http://www.appliancesonline.co.uk/cookers/cookers.aspx) within the post
- Copy and paste the competition badge below and include in your blog post

- Add Homemade by Fleur as a tag on your post / page that you are submitting
- I would love you to sign up to follow my blog to find out the results and of course to see the entrants and winner, but this is not compulsory
- Feel free to like the Homemade By Fleur page and share it with others to get into the Jubilee spirit
- Follow me on twitter for competition updates @homemadebyfleur
- Post your entry on twitter mentioning me @homemadebyfleur and adding #jubileebakingcompetition
- I will retweet you and your post when I see it
General Rules
- Make anything bake or cake that you wish as long as you feel it links to the Jubilee theme and have explained this in your post
- Please email your photographs (no more than 2) and a link to your post to homemadebyfleur@gmail.com
- In that email please also include your name, although I will be listing entries by blog name on the round up
- The deadline is 3rd June 2012
- The winner will be announced a few days after the deadline, so keep you eye out!
- The judges decision is final
Vintage Jubilee Flag Biscuits
To get you all in the mood, I have come up with a Jubilee themed bake of my own. I had a lot of fun making these but the best bit was taking the photos of them on Hove beach in Sussex. I was down there last weekend and along with all the paraphernalia needed for 3 children when planning a day trip to the beach, I packed my biscuits, the mini bucket and spade (pre-filled with sand from our sandpit as I knew Hove beach had pebbles) and my camera. My husband rolled his eyes more than once as I took ages to find the right box to transport the biscuits as we were trying to get out of the door. I’m sure you can picture the scene. But it was all worth it as I love the pictures and the weather was amazing. It has turned out to be the only sunny day in the last 2 weeks, so I was very lucky. It’s a reminder in amongst all the rain that we do have some beautiful days here in England.

 I used the Irresistible Chocolate Biscuit recipe from pg 183 of my new aptly named ‘Biscuit’ cookbook written by GBBO finalist from series 1 Miranda Gore Browne. It’s a great book by the way, and if you are partial to the odd biscuit or two this is definitely one to put on your birthday list. But there are plenty of other cookbooks and online recipes for a basic chocolate biscuit. You will probably find one in a book you already have. What you are looking for is one that creates a biscuit dough that you can roll out and use cutter on.
What you will need:
- 8-10 rectangle chocolate biscuits
- Some royal icing (I used 250g (half a pack) of the royal icing sugar mixed with water and it was enough)
- Approx 100g white fondant icing
- Red and blue food colour (I used my new India Tree natural food colouring for these and thought they were great)
- Pencil (not too sharp) ruler and greaseproof paper
- 4 icing containers/bottles or bags
- 4 icing tips, I used 2 x PME 2 tips for the piping icing and 2 x PME 4 tips for the flood icing
- 8-10 Lollipop sticks

How to make:
- The first thing I did was draw around the rectangle cookie cutter I used to make the biscuits onto greaseproof paper and cut it out. I then drew on the central cross from the Union Jack followed by the rest of the flag, but but I found that I only really needed the central cross as a guide and the rest of the flag I did freehand
- Next I made my royal icing. Follow the back of the pack with regards to the amount of water needed. Aim to have it fairly stiff, but soft enough to pass through a PME 2 icing tip and holds its shape with out any problems
- Divide icing into 4 small bowls. Put two bowls aside then add a little bit more water to the remaining two bowls. You are aiming for the consistency of custard. This is your flood icing and is what you will use to ‘colour in’ your flag. The other two bowls contain your piping icing which is what you will use to pipe the flag pattern onto your biscuit
- Colour 1 piping and 1 flood icing red/pink and 1 piping and 1 flood icing blue then fill the piping icing into the icing bottles or bags that have the PME 2 tip and the flood icing into the icing bottles or bags with the PME 4 tip
- Roll out your fondant icing (not too thick) and use your rectangle cookie cutter again to cut out rectangles of fondant and stick these onto your biscuits with a little bit of royal icing (I just scraped out the last bits from the bowl I mixed my royal icing in to do this)

Icing your biscuit step by step
- Take your greaseproof paper flag and place on top of the fondant. Use your not too sharp pencil to imprint the central Union Jack cross onto the fondant
- Pipe the pink/red central cross onto the fondant and then add the 4 diagonal lines that come out from the centre of the flag using the PME 2 tip and piping icing
- Now add the blue triangles onto the flag using the PME 2 tip and piping icing
- Fill in the cross and diagonal strips with pink/red flood icing and the blue triangles with blue flood icing using the PME 4 tip
- Leave your biscuits to dry for a couple of hours then stick your lollipop stick on the back with any remaining royal icing and leave to dry over night
*Tips*
- Cover your royal icing with a clean damp j cloth to stop it from drying out at any point
- Don’t cut your biscuits too thick. I think I did mine too thick, and consequently they were a bit on the heavy side as it was tricky getting the lollipop sticks to hold
- Sticking these in a bucket is a great idea for a centrepiece at your Jubilee party but these flags can decorate cakes, desserts, or if making mini ones, you could use as cupcake toppers
- To make mini flags all you need to do is make smaller flags. You could use the thinner wooden coffee stirrer as the flag pole instead of a lollipop stick giving you the perfect excuse to go for a coffee. See how Maision Cupcake has used them here

HAPPY BAKING EVERYONE!
Red Prawn and Mango Thai Curry
 I am increasingly becoming quite a fan of Nigella Lawson. No matter what people think of her silk clad midnight snacks there is no doubt that she is quite an inspiration and I’m sure her recipes have created many new foodies. By coincidence, her cookbook ‘Feast’ arrived today. I ordered it due to my growing curiosity about Nigella. The only other Nigella cookbook I have is her Christmas one but some how I felt I was missing out. I’ve had a quick flick though ‘Feast’ and I’m quite excited about getting into bed tonight to read more. Sad I know, but that is perfect bedtime reading for me.
The other reason I have become more interested in Nigella is of course is because I was been lucky enough to briefly meet her a couple of months ago when filming for Baking Mad. I’m also going to be hosting the Forever Nigella blog challenge in June run by Sarah who writes the fantastic Maison Cupcake blog which I am very excited about so watch this space for more details on that.
So for all these reasons I thought that featuring and reviewing one of her recipes on my blog would be very fitting.
This month Vanilla Frost is hosting Forever Nigella for Sarah and the theme is ‘spring’. So the other night I had a look through some online Nigella recipes and came across one for Red Prawn and Mango Curry. It was the addition of mango and the colourful ingredients that made it feel very springtime to me, and in my opinion a great curry recipe is worth it’s weight in gold so I thought I would give it a go.

I decided that I would review based on marks out of 10 for a few set criteria. Hopefully this will make it easier for you to quickly see what I thought of it.
Cost:
The total cost of ingredients where I normally shop in Ocado was £17.56. Calculating the cost based on how much of each ingredient is used the cost was £10.74 and based on the dish serving 4 people it worked out at £2.69 per person. Cheaper than your average take away ruby, so pretty good value if you ask me.
Score: 8/10
Time required to make:
The prep took me about 30 mins, but most of this was peeling and chopping the butternut squash and mango. I did not have any sweet potato so I left it out, but peeling and chopping these would have added on an extra 5 mins the the prep I would say. If you are tight on time you can buy the sweet potato and squash in a prepared pack together and save yourself half the time I would say. The only other thing to mention is that in the recipe it suggests 15 mins cooking time for the squash and potato. Mine took about 40 mins to be soft enough.
Score: 7/10
Skill level needed:
This is a great recipe for beginners. After everything has been prepared it is really just a case of putting most if it in the saucepan and letting it simmer away whilst you get on with something else.
Score: 8/10

Recipe instructions:
I like the instructions. They were easy to follow and nicely formatted on the webpage.
Score: 8/10
Visual appearance of completed dish:
I could not wait to tuck into this meal. Admittedly, I picked this recipe because I thought I would like it, but it really did look scrummy. This would be a great meal to serve friends and you could make it look even nicer by serving with a bit of mango chutney, cucumber raita (my favorite) and a naan or flatbread.
Score: 9/10
Taste:
I have to say that I thoroughly enjoyed this curry. It is sweet and sour, spicy and salty and I love having flavour contradictions in the same dish. When you get mango, butternut squash and prawn in the same mouthful, it is really quite something. I was tempted to close my eyes and say, ‘Mmmmm….” but then that really would have been a bit too much like Nigella, so you will be pleased to hear I did not do this, and instead started up conversation with my husband as distraction. The level of heat and spice in this curry will be down to the red curry paste you use. I really like the Thai Taste range of pastes.
Score: 9/10
Overall, I think it is fair to say that I loved this recipe. I will certainly be making it again, and can’t wait to make it next time we have guests.
Now, if you don’t mind, I’m off to bed to do you know what!

I am also going to enter this curry into Fabulicious Food’s Family Friendly Fridays blog event. There are some great recipes entered this month so hop over and take a look if you get the chance.

‘Cute as a Button’ Frownies
 Chocolate brownies are pure indulgence in my opinion, and perfect for chocoholics like me. They never fail to impress and are always first to sell out at the local cake sale. I like to eat mine with a hot frothy cappuccino on the side.

But I keep wondering if I could make those little squares of gooey dark loveliness even better. My mind whirred into action recently when I read about an opportunity on Bakingmad.com to have a recipe published in a new baking book that is being created in partnership with Silver Spoon and Macmillian Cancer Support. The book is called Little Book of Treats and will be sold in Marks and Spencer stores around the country in August and September this year. Fingers crossed my recipe gets chosen to go in the book.
The brief was to be innovative and exciting, but with a touch of luxuriousness. What better excuse to get my thinking cap on and turn my kitchen into a brownie experimentation lab.

I knew right from the start that my experimentation should primarily involve adding ingredients to the brownie mix, and over the next few days my mind was full of ideas. Most thoughts got dismissed straight away either because they had been done before or they just did not seem special enough. But then an idea came to me which I thought was perfect.
Let me introduce to you my ‘Cute as a Button’ Frownies. No that’s not a spelling mistake. A Frownie is my very own combination of flapjack and brownie, bringing the best elements of two popular tea time treats into one delicious square of cake.
The main added ingredients are oats, hazelnuts and dates. The end result is a chocolate treat that is more satisfying and gives the lucky person eating it both brownie gooeyness and flapjack chewiness.
Why are they so cute? Because I’ve topped them with my own homemade chocolate buttons which happen to be my favourite decoration at the moment. These could quite easily be topped with a shop brought chocolate button too.

My Frownies are easy to make, look scrumptious and taste amazing. I don’t think you need any more convincing. Here’s the recipe.
What you need:
- 200g luxury dark chocolate, roughly chopped
- 175g unsalted butter
- 250g caster sugar
- 100g plain flour
- 100g chopped dates (mine were pre chopped so I let them sit in hot water for 10 mins before I used them just to soften them up a bit. Don’t forget to drain the water before you add to the mix)
- 50g chopped hazelnuts
- 50g oats
- 3 large eggs
- 50g white chocolate and a button mould (I got mine from the lovely Sew White) if making own or a packet of chocolate buttons
- 21 x 27 cm baking tin greased and lined with greaseproof paper
- Makes 12 medium squares or 24 mini squares
How to make:
- Preheat the oven to 170c/325f/gas 3
- Put the chocolate and butter in a large heatproof mixing bowl over a pan of simmering water and melt together
- Mix in the sugar and stir until dissolved, then add the flour, dates, oats and hazelnuts and give it a good stir
- Finally add the eggs and stir again until completely mixed in then pour into the baking tin and gently smooth over
- Put in the oven for 25-30 mins. I tested mine after 25 mins with a knife and it came out with a bit of residue on, but I think for brownies this is fine as they are meant to be gooey inside. If it is a wet residue then it needs a bit longer
- Leave in tin for 10 mins then cool on a wrack. Cut into desired pieces and decorate with buttons sticking them on with a little bit of melted chocolate

I’m also going to enter this into a favorite blog challenge of mine, Alphabakes hosted this month by Ros from ‘The More Than Occasional Baker‘ blog. Ros shares the hosting of this challenge Caroline from ‘Caroline Makes‘ blog. This month the letter is B and on the basis that my Frownie creation is a variation of a Brownie, I can link to the letter B and enter 🙂
Don’t forget that my Natural Selection baking hamper giveaway is still running until 24th April and it includes chopped dates! Just comment on the giveaway blog post to be in with a chance of winning.
Opposites Attract!
 I’ve just had a week away by the seaside with my family in Cornwall, and I have to say it is just what the doctor ordered. Nothing beats some quality family time. The best bit for me was our visits to the beach. Watching my children happily run around for hours building sand castles and paddling in the sea, whilst enjoying a little bit of sun on my face made me a very happy lady.
I loved being cooked for each night, but I did miss not being able to bake for a week, even though I suspect that it was probably good for me! So as soon as I had unpacked I got the ingredients out and started baking for this blog post. I was up for a bit of experimenting and here is the result.
I think the best way to describe these chocolate olive oil cupcakes with a goats cheese frosting is ‘bittersweet’, but in the best possible way. This applies to both the recipe and the final taste.

A contradiction in a cupcake? Not sure? Well let me reassure you. Remember that Paula Abdul song Opposites Attract? Here’s a verse to jog your memory…
“She makes the bed, and he steals the covers. She likes it neat, and he makes a mess. I take it easy, baby I get obsessed. She’s got the money, and he’s always broke I don’t like cigarettes, and I like to smoke. Things in common? Just ain’t one. But when we get together, we have nothin’ but fun.”
And here’s the video if you fancy a trip down memory lane. It’s worth a look if only for the cool little rap in the middle and Paula’s choice of fashion and break dancing attempts. I am a little bit embarrassed to say that I thoroughly enjoyed watching it, and caught myself at one point ‘bopping’ in my chair!
Ah, I loved that song! But the reason I’m talking about it is because the underlying message applies to my cupcakes. You may think that they won’t work because the ingredients are not ones that you might put together ordinarily, but these are quite possibly the best cupcakes I have ever made…and that is saying something.
The cupcake sponge is dark and moist (due to the olive oil) and has just enough sugar added to balance the dark chocolate, cocoa powder and coffee which are three of the main ingredients. These are not in any way bitter, I did not mean that literally, just far less sweet than your average sugar and butter laden cupcake. The word sophisticated comes to mind.

The goats cheese frosting is the sweet part. Both in taste and surprise. The goats cheese works well sweetened and actually makes a mighty fine frosting. Yes you do have to like the taste of goats cheese to start with, but I was genuinely impressed. It’s different, and that is partly why I like it so much.
The inspiration for these cupcakes is two fold. The first is this month’s ‘We Should Cocoa‘ blog challenge hosted by Chocolette, who shares it with Chele from Chocolate Teapot blog. Always trying to keep us on our toes, the challenge was to blog a recipe which had chocolate and cheese in it. In all honesty I did panic a bit when I read this. But in actual fact it’s not so bad, and I doubt I would have made these special little cupcakes if it had not been for the WSC challenge.
The second inspiration was from an American blog that I found whilst looking for chocolate and cheese recipes. It’s called the Vanilla Bean Blog and it is a lovely blog to visit if you have a spare 5 mins. The only problem is that all the recipes are in American cup measurements. Having converted this one I now realise what a nightmare it is. Converting cups to grams depends on what is in the cup, so it all got a bit complicated especially as I was halving the recipe too. Anyway, with a few educated guesses and an new IPad app to help me convert I was more than a little relieved to pull a beautiful set of dark moist cupcakes from my oven.
These are most certainly worth a go!

Chocolate olive oil cupcakes with a goats cheese frosting
What you will need:
Cake
- 50g dark chocolate cut into small pieces
- 175ml hot coffee (I used decaffeinated filter coffee)
- 85g cocoa powder
- 250g caster sugar
- 2 regular eggs
- 315g plain flour
- 80ml olive oil
- 180ml buttermilk
- 1/2 tsp of fine sea salt
- 1 tsp bicarb of soda
- 1/2 tsp baking powder
- 1 tsp vanilla extract (I used my homemade one for the first time)
- 20 cupcake cases (I use the foil ones as they are sturdier and old their shape better)
Makes approx 20 cupcakes
Goats cheese frosting
- 30g soft unsalted butter
- 50g cream cheese
- 50g soft goats cheese (one without the rind which looks a bit like cream cheese)
- 1 tsp vanilla paste (not extract as too much liquid for the frosting then)
- 250g icing sugar (I used natural golden icing sugar which gave the frosting its caramel colour, but it would be fine to use normal icing sugar too)
- 50g chopped walnuts for decoration
How to Make:
- Preheat oven to 190c/375f/gas 5
- Put the chocolate, cocoa powder and hot coffee in a bowl together, stir and leave to melt
- In a large bowl sift together the flour, sugar, bicarb of soda, baking powder and salt. In a second bowl whisk up the eggs in an electric mixer for about 3-4 mins until light and fluffy
- Slowly add oil, buttermilk, vanilla and melted chocolate mixture to the eggs mixing until well combined
- Then add the remainder of the dry ingredients to the mix half at a time and mix with the beater until just combined
- Fill your cupcake cases until 2/3 full. I over filled one and it took another few minutes to cook so it is worth taking your time to get this bit right
- Bake in the oven for 14-15 mins. Test with a knife which should come out clean. If not put back in the oven for another couple of minutes
- Once baked, leave in tin for 10 mins then transfer to a cooling wrack
- To make the frosting beat the butter until softened then add the cheeses and vanilla paste. Mix for about 3 mins until smooth
- Then add the icing sugar bit by bit and beat for about 8-10 mins as this will result in a super smooth frosting. This frosting is not as stiff as butter cream so can’t be piped onto the cupcakes
- Using a palette knife smooth over the frosting onto each of the cupcakes and sprinkle with chopped walnuts


Individual Pistachio and Rose Celebration Cake with Pink Champagne Buttercream
 My blog is 6 months old on the 10th April! It only seems like yesterday that I was sitting on this very same chair at my computer wondering if I should take the plunge and start my own blog. I was scared. Mostly of opening up a window into my life for others to see. What would people think of me? What if nobody read my blog? Why would anyone want to read about me? But deep down I had a bubble of excitement. I could imagine how wonderful it would feel to inspire others to bake and maybe people would like what I write and enjoy reading it! So I went for it and it’s safe to say I have not looked back.
In the 6 months of writing my blog, I feel like I have come so far. I had no idea how much fun it would be or how I would feel writing about something I love in my own way without any rules. I have had unwavering encouragement from my family and friends and I have made so many new friends both online and face to face. There is a fantastic blogging community out there which is incredibly supportive, and I have loved becoming part of this. Planning my posts, baking, photographing what I have made and writing about it is now a very important part of my week. People often ask me where I want to go with this blog, and although I can’t give a precise answer, I do know that it is a fabulous adventure which keeps getting better and I am thoroughly enjoying the ride.
One thing I have learnt in the last 6 months, is that the blogging world is full of awards. Which is a great because whilst writing a blog is a fantastic thing to do, it is also a lot of hard work behind the scenes. I have had many late nights baking, writing, formatting and organising blog posts to ensure that my blog is the best I can make it. I’m a bit of a perfectionist!
Many of these awards are based on votes from readers, and I kind of wish they weren’t as I’m just not used to canvasing for votes. However, last week I found out that I have been shortlisted out of 12,000 nominations for the ‘Tasty’ category in the Britmum’s Brilliance in Blogging awards which I am so chuffed about, I just could not keep it quiet.
So firstly I need to say a big thank you to everyone who nominated me in the first instance. It feels amazing to have made the shortlist it really does. I am 1 of 20 shortlisted blogs in this category. The next stage is to become 1 of 8 finalists which would mean an invitation to an awards ceremony in London, (and therefore a new dress) where a panel of high profile judges pick the final winner. Being a finalist would be incredible. Just having that recognition for my blog would be such an achievement and would mean lots of new and exciting exposure for my blog.
But I’m not just going to ask you to vote for me, I’m going to give you good reason to take the time and vote for me. In celebration of my blog being 6 months old and for making the Brilliance in Blogging shortlist I have created the most scrumptious celebration cake you ever did see (and taste). Inspired by my favorite summer flower, my love of pink champagne and a my very dear friend Anna (because its pink and has champers in it) I have come up with a cake that will make any celebration one to remember. I made it mini sized because that was perfect for me, and it is my celebration cake after all. But also I think there is something special and understated about making an individual sized cake for someone. It’s not over the top, yet all the effort and sentiment is still there in extremely cute proportions.
How to vote:
So here is how to vote if you would like to. Click on the BIB logo below and you will be taken to a survey monkey form. Scroll down to the ‘Tasty’ shortlist (it’s not that far down, category number 2) and click next to Homemade By Fleur. Scroll to the bottom and click submit and that’s it. A big thank you to anyone in advance who votes xxx I’ll let you know how I get on.

Recipe: Mini Pistachio and Rose Celebration Cake with Pink Champagne Buttercream
What you will need:
Cake:
- 2tsp rose syrup (I used Star Kay white rose water)
- 120 ml whole milk
- 120g plain flour
- 100g sugar
- 1.5 tsp baking powder
- 40g unsalted butter
- 30g pistachio nuts (25g for cake, 5g for decoration on top) finely chopped. I put mine in the food processor for 1-2 mins
- 2 x 11cm sandwich cake tins greased and lined
- large metal spoon
Pink Champagne Buttercream
I prefer not to have too much buttercream on my cake, but if you like lashings of it, you might want to double these quantities.
- 40g unsalted butter
- 165g icing sugar
- 25ml pink champagne (there should be plenty left in the bottle to pour yourself a glass once you have finished the cake :-))
- Pink food colouring (optional)
- Palette knife
Iced roses
- 150g royal icing sugar
- 1-2 tsp water
- Pink and green food colouring (most supermarkets sell natural colours although I did not use them on this occasion)
- Small rose and leaf icing tips
- Icing bags

How to make:
- Preheat your oven to 170c/325f/gas 3
- Put the flour, sugar, baking powder and butter in an electric mixer and combine with a paddle attachment until thoroughly mixed in and has a sand like consistency
- Slowly add the milk, then the rose water, then the eggs
- When you have a smooth batter, fold in the chopped pistachio with a large metal spoon ( remember to save a bit for the decoration)
- Divide the batter between the two cake tins, gently smooth over and put in the oven for 25-30 mins. To check that they are done stick a knife in both cakes and it will come out clean if baked. If not, pop back in for another 5 mins
- Let the cakes cool in the tins for 5 mins, then turn out onto a cooling rack
- Whilst cooling you can make the buttercream. For this just add the icing sugar and soft butter to a bowl and start to mix with an electric mixer. Then add the champagne slowly. Once all the champagne has been added, add a few drops of pink food colouring. I just did one drop at a time as I knew I wanted a light pink. Once you are happy with the colour, continue to mix the buttercream for another 5 mins or so. This step is quite important as it stops your buttercream from being grainy and gives it a light fluffy texture
- Once your cakes are cool slice off any bumps that have risen up on the top of each sponge. Then slice each sponge in half lengthways. Then fill each layer with butter cream and build up your 4 layer cake.
- Then use a small palette knife to cover the outside of the cake with the remainder of the buttercream. I used upwards motions in the side of the cake
- Sprinkle your remaining chopped pistachio around the top of the cake, then make your royal icing by mixing the royal icing sugar and water together until it forms soft peaks. It is probably best to add the water slowly and watching the icing come together. You may need a little less or more water than I have suggested
- Divide your royal icing into two and colour one dark pink and the other one green. To make a rose I watched a couple of You Tube videos, this video is a good one. Essentially you start with the fat part of the icing tip at the bottom and pipe a small closed circle. In some videos they used a flower pin to do this, I just had my cake on a turntable and moved it round as I went. You then start to add on the petals piping 3 around on the first layer and then 4/5 on the second layer. I does not look like a rose to start with but quickly becomes recognisable. I needed a few practice goes first and I piped mine straight onto the cake when I was ready.
- To create leafs, just point the leaf tip close the rose, flat side down and pipe out some icing pulling away as you do and stop piping when it is big enough pulling high to break the icing off
- Give to someone very special and make their day x
If you are inspired by this cake you must also check out fellow blogger Cakeboule’s Tiffiany inspired champagne layer cake. It’s stunning.

I’m also going to send this over to Kate from What Kate Baked to enter the Easter themed Tea Time Treats. This challenge is shared with Karen from Lavender and Lovage. As Easter is a celebration and a time for getting together with the family I think this little cake would make a lovely addition to any table of treats over the Easter weekend.
Natural Selection Baking Goodies Hamper Giveaway #1
Exciting news folks! I have my first ever blog giveaway to tell you about. The people from Natural Selection who sell a gorgeous range of dried fruit, nuts and seeds have given me a marvelous hamper of baking goodies to give to one lucky person, (RRP £49). Here’s a list of what you will get inside the hamper:
3 x packs of Chopped Apricots
3 x packs of Dried Cranberries
3 x packs of 5 Fruit Mix
3 x packs of Crystallised Ginger
3 x packs of Cinnamon Cranberries
3 x packs Chopped Dates
2 x packs of Crimson Raisins
1 x Natural Selection branded apron
1 x rolling pin
1 x Great British Bake Off: How to Bake: The Perfect Victoria Sponge and Other Baking Secrets
Perfect for any bakers out there who like to experiment by adding dried fruit to their cakes and bakes, or if you are like me and think that yogurt sprinkled with dried fruit and seeds is the best thing since sliced bread.
Holly Bell, finalist from the Great British Bake Off who writes a blog called, ‘Recipes from a Normal Mum’ has created mini simnel cupcakes using Natural Selection products. They look super cute and it is definitely worth popping over to her blog to have a look. There is also a helpful video where Holly shows demonstrates how to make them.
Coupon Alert! – The other great news is if you ‘like’ Natural Selection Foods on Facebook, you can print off a coupon to save £1 on bags of Natural Selection products at ASDA and Sainsbury’s
How to enter:
You need to write a comment on this blog post which answers the following question:
If you were to win the Natural Selection baking goodies hamper, what would you bake using any of the ingredients from it?
And that is it. Easy peasy!
You might like to follow me via my Blog, Facebook or Twitter*
- To keep up to date with my baking adventures and hear the winner announced
Also
- I’d love you to tweet about this giveaway. Just cut and paste the following tweet: *I’ve entered @homemadebyfleur ‘s Natural Selection Baking Goodies Hamper giveaway, http://wp.me/p1UMex-kh / *
- Finally, feel free to like my facebook page and share this giveaway with your pals
*not compulsory, just if you are feeling extra nice 🙂
Competition rules:
- To enter you must leave a comment on this blog post before the deadline
- The deadline for this competition is 5pm on the 24th April 2012
- It is not possible to give extra points if you tweet, share or follow with regards to this giveaway
- The winner will be picked after the deadline by a random number generator
- Your number will be the order in which the comments appear below
- The winner will be announced on this blog, facebook and twitter on the 25th April 2012
- The winner will be required to provide a postal address in order for Natural Selection to send the prize
- Open to residents of the UK only
Thank you to Natural Selection for sponsoring this post and providing the prize.


